Autumn Mood Forest Interior. Making of Interior by 3Dmitri.
Hello. My name is Dmitri Revyakin (3Dmitri), I am a CG Artist and professional Architectural visualizer from Ukraine (Dnipro). I got a lot of questions about my last work "Autumn mood forest interior design" on the net, so I decided to do a little Making of. In this ltutorial I will show the most important points in my opinion.

Idea
This one, like the elses, is born in my head, and is waiting in the wings for implementation. For many of them, he will never come :) But fortunately, this idea was implemented. I had very little free time, namely 3-4 hours, so I used ready-made 3D furniture models and a stage. I did not use references this time. The whole concept is from the head.
3D Modeling
As I wrote above, all models of this scene are librarys. For the base for the room, I used the interior scene of the Casa Fontana Stanton Williams Architects network. There are large stained-glass windows, and a finished room. Almost ready, of course, I had to adapt everything a bit to my idea, and my cameras.
Furniture models taken from the libraries of Evermotion, Archinteriors vol. 49. They are of excellent quality and the materials are excellent. I spent a minimum of time refining the materials. Here is a very important point. Do not forget when you use the ready-made library model that the materials in the scene may be outdated. The textures are the same. The sphere of 3D graphics is developing very quickly. A model 2-3 years ago can be updated with modern high-quality materials, and it will look like new. For frequent mapping they are configured. Just pick a higher resolution texture, add more reflection bump maps, etc.

Origami model from 3ddd site. She's free and pretty old. But that’s enough for me. She has a good base for revision. Model Link - https://3ddd.ru/3dmodels/show/origami_crane
Materials and textures
I updated half of the materials and textures in this scene. I used scans of skin textures from Arroway for example. The wood on the floor and on the furniture also refreshed. Below I will show screenshots of materials.
Leather on chair:

Wooden floor:

Table and stool:

Flower. Leaves:

Concrete:

Lightning
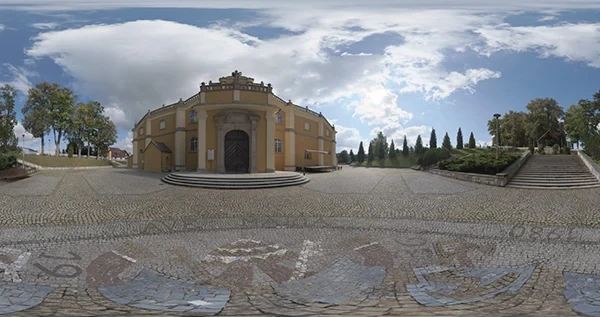
The whole scene is lit by one HDRI map from the HDRI heaven website. It is only added to Enviropments and Effects, as an Enviropment map. The texture resolution is 16K, this allowed me to use it as a background (given my render resolution). But if I were to make final resolutions over 2000 pixels, the background would blur. It would require a higher resolution of the HDRI or insert the background separately.

https://hdrihaven.com/hdri/?h=autumn_crossing

I twisted the HDRI map horizontally in the scene so that there were light and dark areas outside the window. Have a greater contrast of light and reflections of room objects.
Rendering
Since modern rendering systems allow you to change colors, shades, etc. right during rendering, this part of the lesson can no longer be called post-processing. I have not used post processing since about the time Corona Render came out. Everything that is needed is already built into it. Therefore, there is practically no Photoshop here, except maybe Levels.
Now, in stages, I will show what I did to get this kind of picture that matches the background as much as possible.
A pure render without Tone mapping, Curves, LUT and Bloom looks like this. Just like 90% of the renderings that I see online every day. An option for those who either do not want or do not know what to do in order to give the picture mood and a different look from pop renders.

Turn on Tone mapping. Exposure is disabled because I turned on DOF in the cameras. The exposure is adjusted from the camera, not from the Corona Buffer. This settings are not universal and are suitable only for this mood render. We need our own individual settings. They should be combined and complement the render.

Turn on the Curves Editor. And I will show how the curve itself looks. Modern renderings move away from pure black shadows, a bit of highlighting. The picture seems to be a little pale, but at the same time, you can not lose both depth and contrast. This effect is needed in moderation.

Turn on the LUT. One of the standart in Corona Renderer. And now, with a combination of all the above actions, the picture has the final look. As you can see, the HDRI map itself did not give us such an effect.

Well, a bit of Bloom and Glare. I wanted to get more Bloom than spotlight for this scene. But then again, in another scene, such settings may not be appropriate. Everything is very individual.

Composition.
I wrote in my last lesson to the work of the "Hut adventurer" about the principles of combining light and cameras. But will repeat briefly here. I try to always place the camera opposite or to the side of the main light source. On the example of this picture you can see it. The camera is exactly opposite the window. With this angle and position of the light, we have a very strong contrast on every object in the scene. The contrast of objects gives the picture depth. All the other foreshortenings are made on the same principle, plus they have the DOF effect and also the arranged plans (front, middle with main object, and far).


That's all. Thank you for your attention, I hope this lesson will be useful to you. If you have any questions, ask them in the comments I will answer.
The author also shared the scene for educational purposes: DOWNLOAD THE SCENE

1. Скажите почему карту освещения вы добавили только Enviropments and Effects? В Multyplay maps она не добавлена
2. У вас альбедо в некоторых материалах стоит 1:0 . Вы оставили его неизменным для эффекта?
И еще не получается скачать сцену
1. Не знаю что такое Multyplay maps. Для освещения сцены достаточно одного environment and effects.
2. Не менял альбедо. В принципе не меняю этот параметр.
Я наоборот все упрощаю в своих сценах, и вам показываю, что для хорошего результата нужно совсем не много. А вы спрашиваете почему я не усложняю сцену и не трачу время на вещи которых вы на рендере и не заметите :)
Enhancing 3D Visualizations with Stable Diffusion AI
"New World" Tutorial by uto.vz
Making of "Coming Home" using Blender and Cycles
Making of "The Farmhouse" in D5 Render by Figment Visual
Doing the Interior CloseUp Renders in Vray with Romuald Chaigneau
The Making of Slabtown 4 Renderings by Scott Edwards Architecture

Latest Discussions
Thank you so much!! 
Beautifully composed scene! The sense of depth and lighting are just perfect. ✨
Harika bir sahne kurgusu! Derinlik ve ışık kullanımı mükemmel. ✨
Great list! I’ve been following Arch Viz Artist (AVA) for a while — their tutorials are top‑level. Discovered a few new favorites here too. Thanks for such a helpful compilation!
Great list. I am Abdullah from 7CGI. I would expect the list to have "Neoscape" in it, though. It's always interesting to see how studios around the world are pushing the boundaries of architectural visualization. We recently published a list in a more comprehensive and entertaining manner, highligh
Looking for a reliable and skilled 3D architectural visualization partner?
We specialize in creating high-quality, detailed 3D visualizations that bring your ideas to life. Let’s work together on your next project!




Thank you so much!!